
Your travel backpack has hauled through monsoons, survived dusty trails, and absorbed sweat from mountain summits—now it reeks of stale sweat and looks like it survived a mudslide. That stubborn sand still trickling from the bottom panel? The mysterious sticky residue on your shoulder straps? Before you replace it, proper cleaning can restore your pack’s performance and extend its life by years. This guide reveals exactly how to wash travel backpack safely without damaging waterproof coatings or warping structural components. You’ll learn material-specific techniques, emergency drying tricks, and professional tricks to eliminate odors that linger after standard washing.
Eliminate Hidden Debris Before Washing
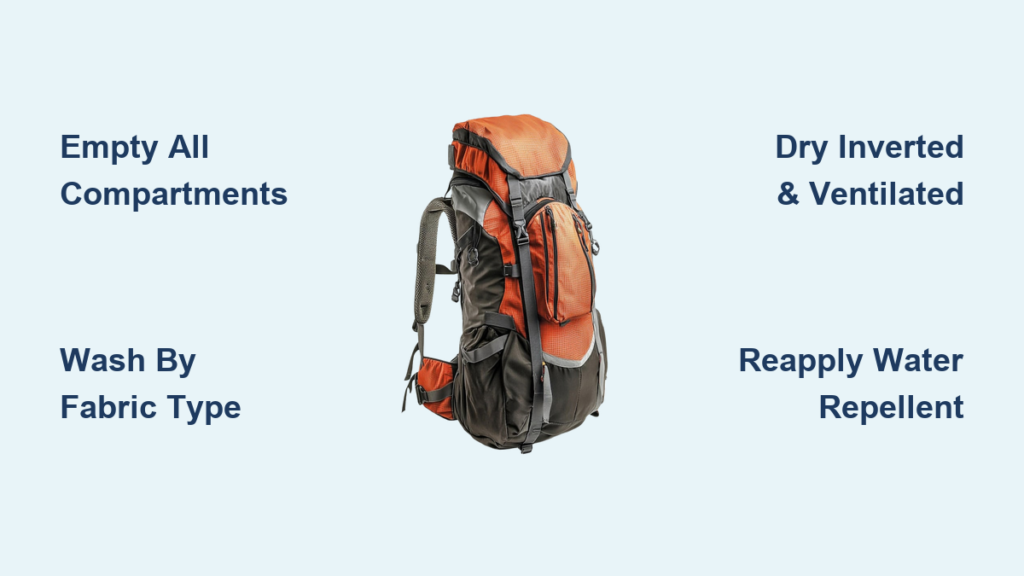
Empty Every Compartment Thoroughly
Start by removing everything from all pockets—including the secret passport sleeve and those side water bottle holders you haven’t checked in months. Turn your pack inside-out through the main opening and shake vigorously over a trash can. You’ll uncover forgotten souvenirs: beach sand, foreign coins, dried fruit stains, and that dead battery you thought vanished. Critical step: Use a flashlight to inspect seam intersections where crumbs and grit accumulate—these hidden pockets accelerate fabric wear during washing.
Prepare Hardware for Water Exposure
Unbuckle all clips and open zippers to their maximum extent before wetting your pack. This prevents stress fractures in zipper teeth and allows water to drain freely through interior channels. Remove detachable components immediately: hip belts, rain covers, and aluminum stays must be cleaned separately. Never skip this: Leaving compression straps tightened traps moisture against fabric, causing mildew in hidden areas. If your pack has an internal frame sheet, slide it out completely—submerging HDPE or carbon fiber components risks delamination.
Pre-Treat Stains Based on Composition
Identify stain types under bright light:
– Protein stains (blood, sweat, food) require enzyme cleaners
– Oil-based marks (sunscreen, grease) need dish soap
– Dye transfers (ink, wine) respond to rubbing alcohol
Apply treatments 30 minutes pre-wash using circular fingertip motions—never scrub coated fabrics as this destroys DWR (Durable Water Repellent). For salt rings on straps (common after hiking), saturate with vinegar-water solution first. Test any cleaner on a hidden seam allowance to avoid color damage.
Wash by Fabric Type Without Ruining Performance

Technical Fabric Cleaning (Ripstop Nylon/Cordura)
Hand-wash in lukewarm water (max 30°C/86°F) with 2 capfuls of technical gear detergent—regular soap strips waterproofing. Submerge completely and gently swish for 5 minutes. Focus on high-wear zones: the bottom panel, top lid, and strap contact points using a microfiber cloth. Rinse until water runs crystal clear (typically 3-4 cycles)—residual soap attracts dirt faster.
Machine wash only if your manufacturer’s tag permits: Place in a mesh bag, use front-loader only, cold water, and ¼ normal detergent dose. Never use top-loaders—the agitator will rip straps from anchor points.
Canvas and Cotton Blend Restoration
These tolerate warm water (40°C/104°F) and gentle scrubbing with a soft brush. Expect 5-10% shrinkage—reshape while damp by stuffing with towels to maintain original dimensions. Rinse exhaustively; leftover detergent stiffens fabric permanently. For mold spots from tropical trips, spot-treat with 1:10 bleach solution only on colorfast areas, then rinse 5x.
Protect Leather Accents During Cleaning
Mask leather trim with painter’s tape before washing the main body. Clean leather separately with a barely damp cloth and specialized conditioner—never saturate as this causes irreversible cracking. Wipe leather components immediately after exposure to moisture, then recondition while slightly damp to preserve flexibility.
Deep Clean Critical Components Separately
Eradicate Interior Odors and Stains
Light-colored linings reveal every spill. For general brightening, apply a paste of baking soda and water, let sit 20 minutes, then rinse. Combat tropical mildew with an overnight soak in water + 1 cup white vinegar, followed by 2 hours of indirect sunlight. Warning: Bleach solutions (1:10 ratio) work only on confirmed colorfast linings—test first on a hidden seam.
Rescue Sweat-Soaked Straps and Hip Belts
These absorb body oils most intensely. Hand-wash separately in the sink with mild soap, focusing on foam contact areas. Squeeze water out—never wring—and press between towels. Check padding integrity: if straps remain heavy or smell sour after 48 hours of drying, the foam is waterlogged and needs replacement.
Maintain Zipper Functionality Post-Wash
Submerge zippers in soapy water and work sliders back/forth for 2 minutes to flush grit. For salt-corroded hardware (common after beach trips), soak in 50/50 vinegar-water for 15 minutes, then rinse. Once dry, apply silicone spray—not WD-40—to zipper teeth; petroleum jelly revives sticky buckles.
Dry Without Warping or Mildew
Drain Water Safely Before Air-Drying
Stand your pack upright in the shower for 10 minutes to drain. Press padding areas between dry towels—never twist—to absorb moisture without distorting foam. Stuff compartments with clean, dry towels to maintain shape during drying. Critical error to avoid: Skipping this step traps water in strap channels, causing hidden mildew.
Optimize Air-Drying for Fast Results
Hang inverted from a sturdy hook using the top grab handle, with all zippers open. Position in a shaded, well-ventilated room—never direct sunlight which degrades nylon fibers. Rotate the pack every 4 hours for even drying. Expect 36-72 hours drying time; humid climates add 24+ hours. Pro tip: Point a fan on low setting toward the interior to cut drying time by 30%.
Emergency Drying for Time-Crunched Travelers
In urgent situations, place your hanging pack in a room with a dehumidifier running overnight. Never use:
– Clothes dryers (melts coatings)
– Hair dryers (warps stiffeners)
– Radiators (causes irreversible shrinkage)
If straps remain damp after 24 hours, replace internal towels and add silica gel packs inside compartments.
Restore Performance After Washing

Recharge Water Repellency Immediately
Washing strips DWR coatings—reapply spray treatment only to exterior surfaces while fabric is still slightly damp. Focus on high-impact zones: the bottom panel, lid flap, and top strap surfaces. Heat-activate with a hair dryer on low for 2 minutes, or tumble dry on no heat for 15 minutes if the manufacturer allows. Never use wash-in DWR—it clogs fabric pores.
Prevent Hardware Failure Long-Term
Once fully dry, lubricate zippers with silicone spray and work sliders thoroughly. Apply a rice-grain-sized drop of petroleum jelly to buckle springs if they feel stiff. Store with all zippers open to prevent tooth misalignment during off-seasons.
Store Correctly to Avoid Future Damage
Must be 100% dry—test interior seams with a tissue for moisture spots. Store loosely stuffed with acid-free paper in a breathable cotton bag (never plastic). Keep in a climate-controlled space away from windows—UV exposure degrades fabrics even in storage.
Fix Common Washing Disasters Fast
Kill Lingering Odors That Resist Washing
For smoke or chemical smells: seal activated charcoal bricks inside a plastic bin with your pack for 48 hours. For persistent mustiness, use Nikwax Tech Wash—never household odor removers which damage coatings. Never try: Baking soda sprinkled inside—this attracts moisture and worsens mildew.
Remove Chalky Detergent Residue
White film means incomplete rinsing. Refill your tub with cool water + 1 cup white vinegar, submerge pack, and gently swish for 10 minutes. Rinse until water feels slick-free (no soap residue). Repeat if needed—this residue makes fabric attract dirt faster.
Address Shrinkage Before It Sets
If hip belts or straps shortened, gently stretch them while damp and secure with binder clips to hold the extended position during drying. For severe shrinkage, contact the manufacturer—replacement straps often cost less than a new pack.
Follow These Cleaning Schedules Religiously
Heavy users (weekly travel): Do a quick freshwater rinse after every 3 trips, deep clean quarterly. Moderate users (monthly trips): Spot-clean straps after each journey, deep clean biannually. Light users (annual vacations): Deep clean before storage and after each trip.
Wash immediately if you notice:
– Salt crystals on straps (appears as white rings)
– Fuzzy mold spots in dark pockets
– Zippers sticking despite cleaning
– Persistent sour smells after airing out
A properly cleaned travel backpack doesn’t just look better—it performs better. Zippers glide smoothly, straps cushion without chafing, and waterproof coatings repel rain like new. By following these precise methods, you’ll extend your pack’s life through countless adventures while avoiding costly replacements. Your next trip deserves a fresh, functional companion—revive yours today.