
Traveling with breast milk doesn’t have to disrupt your breastfeeding journey. Whether you’re flying across the country for a business trip or driving to visit family with your little one, knowing the ins and outs of breast milk transportation keeps your liquid gold safe and accessible. The TSA’s special exemptions for breast milk mean you can travel with confidence when you understand the rules and prepare properly. In this guide, you’ll discover exactly how to travel with breast milk through airports, on planes, and to your destination without compromising safety or supply.
Navigating security checkpoints with breast milk containers used to cause anxiety for many nursing parents, but current TSA policies make the process straightforward when you know what to expect. With the right packing strategy and knowledge of your rights, you can breeze through security while keeping your expressed milk at optimal temperatures throughout your journey. We’ll walk you through every step—from declaring your milk at security to storing it properly in hotel rooms—so you can focus on enjoying your trip rather than worrying about your milk supply.
Bypass TSA Liquid Limits with Breast Milk Exemptions
Carry-On Breast Milk Without Quantity Restrictions
Breast milk receives special treatment as a medically necessary liquid, allowing you to carry any amount through security regardless of your baby’s presence. Unlike standard liquids limited to 3.4 ounces, your expressed milk containers can exceed this size without fitting into a quart-sized bag. This exemption also covers ice packs and cooling accessories, even when you’re not transporting actual milk—essential for parents traveling solo who need to maintain their supply.
Key advantages you’re entitled to:
– No maximum quantity limits for breast milk
– Separate screening process that won’t damage nutritional value
– Cooling accessories permitted without accompanying milk
– Rights that apply whether your baby travels with you or not
Streamline Security Screening with These Steps
Before reaching the security conveyor belt, proactively inform the TSA officer you’re carrying breast milk. Remove all milk containers, ice packs, and feeding supplies from your bag for individual screening. This declaration prevents delays and ensures proper handling of your medically necessary items.
What to expect during screening:
1. Officers may use Bottle Liquid Scanners to test for explosives
2. They’ll never insert anything into your milk containers
3. X-ray machines won’t harm your milk’s nutritional quality
4. You can request alternative screening if uncomfortable with standard procedures
Pro tip: Keep a printed copy of TSA guidelines in your diaper bag. While not required, having official documentation speeds up resolution if you encounter an officer unfamiliar with breast milk policies.
Choose TSA-Friendly Containers for Faster Screening
Opt for clear, translucent bottles instead of plastic bags or pouches to expedite the security process. Officers can visually inspect the contents without opening containers, reducing the chance of additional screening. Plastic bags often trigger Explosive Trace Detection procedures that require opening your milk, potentially causing spills or contamination.
Pack Strategically for Your Travel Scenario

Flying with Your Breastfeeding Baby
When traveling with your infant, pack expressed milk for the journey plus extra for unexpected delays. Keep nursing essentials in your most accessible bag: nursing cover, burp cloths, pacifiers, and bottles or storage bags.
Essential carry-on items:
– 2-3 days worth of pumped milk (frozen or fresh)
– Insulated cooler bag with frozen gel packs
– Clean feeding containers with tight-fitting lids
– Backup pump and extra batteries
– Nursing cover for privacy during flights
Traveling Alone While Maintaining Your Supply
When separated from your baby, you have three effective milk management strategies. Express and store milk in hotel refrigerators for shipping home later, ship frozen milk directly using overnight services with dry ice, or “pump and dump” to maintain your supply when storage isn’t possible.
Critical reminder: Pumping and discarding milk isn’t wasteful—it’s essential for preserving your milk production during temporary separations. Stick to your baby’s normal feeding schedule by pumping every 2-3 hours to prevent supply drops or discomfort.
Keep Breast Milk Safe During Travel
Set Up Proper Hotel Room Storage
Call your hotel in advance to request a mini-refrigerator, explaining the medical necessity for breast milk storage. Once in your room, store milk containers at the back of the refrigerator where temperatures remain most stable. Use BPA-free plastic or glass containers with tight-fitting lids, clearly labeled with dates and times.
Maximize Cooler Bag Effectiveness
Freshly expressed milk stays safe in an insulated cooler with frozen ice packs for up to 24 hours. For longer trips, invest in a high-quality cooler with separate compartments for ice packs and milk containers. Check temperatures regularly using a small thermometer placed inside the cooler.
Cooler management tips:
– Layer milk bags between ice packs for even cooling
– Replace ice packs every 12 hours when possible
– Check milk every few hours during travel
– Store milk with ice crystals in the freezer immediately upon arrival
Transport Frozen Milk Without Compromising Quality
When traveling with frozen milk, monitor thawing progress carefully. Milk with remaining ice crystals can be safely refrozen, while completely thawed milk must be used within 24 hours. Never refreeze fully thawed milk, as this risks bacterial growth and nutrient loss.
Navigate Airports Like a Pro Nursing Parent
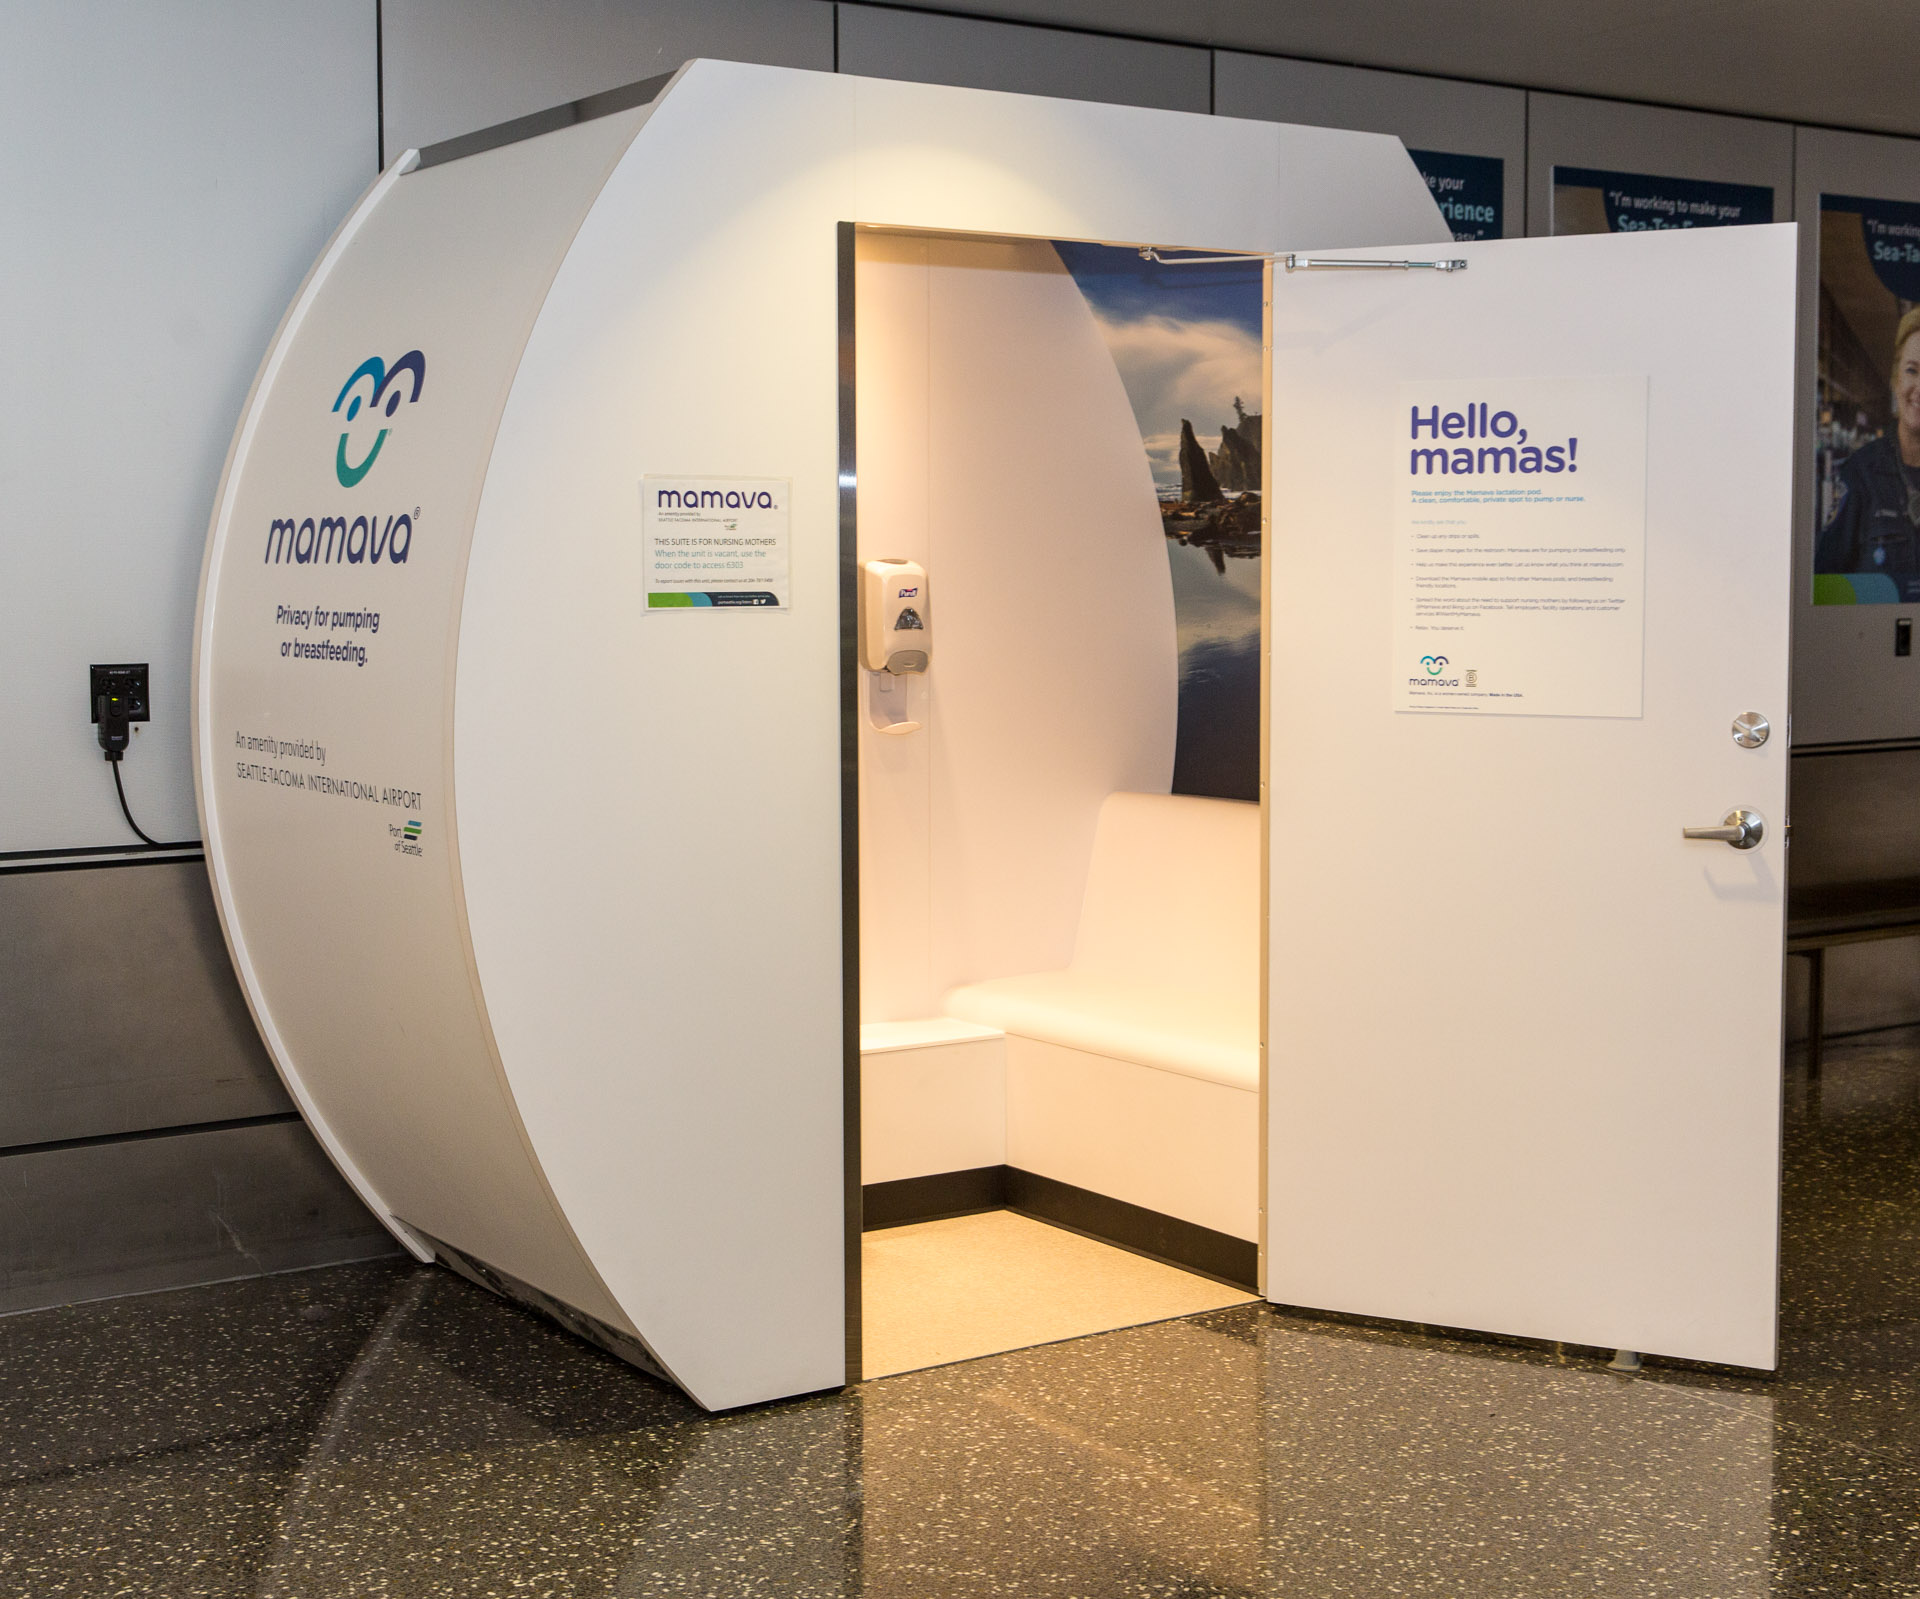
Locate Lactation Rooms Before Your Flight
The Friendly Airports for Mothers (FAM) Act requires major airports to provide private, non-bathroom spaces for pumping or nursing. Check your airport’s website before traveling or use apps like Mamava to locate these facilities near your gate. These rooms typically include electrical outlets, comfortable seating, and sometimes sinks—perfect for expressing milk between flights.
Ace Security Checkpoints with These Tactics
Allow 30 extra minutes at security checkpoints to accommodate breast milk screening. Place your milk containers in a separate clear bin from other liquids, keeping TSA guidelines easily accessible. Stay calm and cooperative during screening—remember that officers are trained on these policies, though individual experiences may vary.
Prepare for International Travel Challenges
International regulations vary significantly by country. Research destination-specific breast milk policies through the CDC’s Yellow Book before traveling abroad. Some countries have restrictions on milk importation, while others follow similar exemptions to TSA rules.
Prevent Supply Drops While Traveling
:max_bytes(150000):strip_icc()/prt-breast-pumps-test-philips-avent-electric-double-white-travel-bag-abby-mercer-01-54c27d09d51042049df986542612f1a0.jpg)
Maintain Your Pumping Schedule Away from Baby
Stick to your baby’s normal feeding rhythm by pumping every 2-3 hours during waking hours. Set phone alarms as reminders and pack spare pump parts and batteries. Bring a manual pump as backup—its compact size provides crucial redundancy if your electric pump fails.
Recover Your Supply After Returning Home
Temporary dips in milk production after travel are normal. Resume regular nursing or pumping immediately upon return, increasing skin-to-skin contact to boost supply. Most parents see milk production return to normal within 3-7 days of consistent feeding after reuniting with their baby.
Avoid Costly Breast Milk Travel Mistakes
Prevent Temperature-Related Spoilage
Never leave milk at room temperature longer than 4 hours (reduce to 2 hours in hot climates). Use insulated bags even for short trips between locations, and avoid storing milk in car glove compartments or near windows where temperatures fluctuate.
Pack Realistic Milk Quantities
While having extra milk provides security, consider your cooler’s capacity and weight restrictions. Pack only what you can realistically keep cold, plus a small buffer for unexpected delays. Overpacking creates unnecessary stress and increases spoilage risk.
Declare Breast Milk Upfront at Security
Don’t try to hide breast milk among other liquids—this triggers additional screening. Declare it immediately to the TSA officer and separate it from other items. Attempting to conceal cooling accessories with other frozen items often causes longer delays and more invasive screening.
Create Emergency Backup Plans for Milk Emergencies
Prepare for Supply Chain Disruptions
Research local milk banks or pharmacies at your destination before traveling. Some areas have breast milk donation networks that can provide emergency supplies if your cooler fails or flights get significantly delayed.
Pack Redundant Pumping Equipment
Bring multiple pumping options: electric pump with battery pack, manual pump, and extra flanges. A small hand pump takes minimal space but provides crucial backup if your primary equipment fails during travel.
Traveling with breast milk requires preparation but becomes routine with practice. Understanding your TSA rights, packing strategically, and maintaining your pumping schedule ensures your milk stays safe whether you’re away for a weekend conference or a week-long family visit. Every successful trip builds confidence for your next adventure with your liquid gold—so embrace the journey knowing you’ve got this covered.