
Your carry-on sits wedged between the vacuum and winter coats. The weekend tote sags under a pile of shoes. Sound familiar? When travel bags multiply but square footage doesn’t, creative storage becomes essential. Whether you’re organizing a studio apartment or maximizing a walk-in closet, these travel bag storage ideas transform cluttered chaos into accessible, protected storage—without sacrificing style or breaking the budget. Stop wrestling with your suitcase every time you need it and discover how to give each bag its perfect home.
Maximize Vertical Closet Space Immediately
Over-Door Organizers Hold 20 Pounds Each Without Drilling
Transform the back of any door into instant bag storage with over-door organizers featuring reinforced pockets. Each compartment handles bags up to 12 inches wide and 8 inches deep, supporting 20 pounds per pocket. Installation takes seconds—no hardware required. The standard organizer fits doors 1⅜ to 1¾ inches thick, making it perfect for bedroom, closet, or even bathroom doors. Forget wasting prime closet real estate when you can utilize this often-overlooked space.
Pro tip: Use the top pockets for lightweight totes and lower sections for heavier weekend bags. Clear vinyl panels let you spot the right bag instantly—no more digging through dark corners. Avoid common mistakes like overloading pockets or using organizers on hollow-core doors that can’t support the weight.
Hanging Organizers Triple Storage Capacity in Your Existing Rod
Cascading hooks create multiple storage tiers within your existing closet rod space. Each 12-by-12-inch tier stores 4-6 medium bags, while mesh sides prevent musty odors. Premium versions include clear panels for visibility—no more digging through dark closet corners. Position these 10-12 inches apart for handbags and 16-18 inches for larger travel pieces. You’ll be amazed how many bags disappear from your floor into this vertical space.
Quick setup: Install the organizer within 30 minutes using standard hooks. For heavy leather bags, space hooks every 12 inches to prevent sagging. Always check weight limits before loading—most systems handle 8-12 bags comfortably.
Adjustable Shelving Units Fit Any Space and Bag Size

Standard 12-18 inch deep shelves adjust from 8 to 24 inches high, accommodating everything from clutches to carry-on luggage. Weight capacity ranges 100-200 pounds per shelf, so even heavy leather weekender bags stay secure. For optimal organization, space shelves 10-12 inches apart for daily handbags and 16-18 inches for travel bags. This customization prevents the common mistake of stacking bags, which causes permanent creases and damage.
Visual cue: Look for shelves with front lips to prevent bags from sliding forward. Install shelves at eye level for bags you use weekly and higher for seasonal luggage. The right spacing ensures easy access without constant rearranging.
Under-Bed Storage Hacks You’ll Wish You Knew Sooner
Rolling Containers Glide Out Smoothly Without Heavy Lifting
Low-profile boxes measuring 39″ x 20″ x 7″ slide completely under most beds while holding 2-3 medium suitcases. Wheels support 50 pounds—no lifting required. Clear polypropylene construction lets you see contents, while modular systems expand capacity as your collection grows. These containers solve the universal problem of bulky luggage taking up valuable floor space.
Quick setup: Label each container by trip type—weekend, business, beach—for grab-and-go convenience. Keep frequently used bags in the easiest-to-reach containers. Avoid the common error of overfilling, which can cause wheels to jam or containers to get stuck.
Vacuum Bags Shrink Bulky Items by 75% for Maximum Space
Extra-large vacuum bags (28″ x 40″) compress puffer coats and bulky travel gear, creating space for actual luggage. The airtight seal blocks dust, moisture, and pests while zippered openings maintain accessibility. Use small bags (18″ x 22″) for delicate clutches and large sizes for full-size luggage. This technique is especially valuable for seasonal items you only use a few times a year.
Time estimate: Vacuuming your entire collection takes about 15 minutes with a standard household vacuum. Check bags monthly for air seepage, especially in humid climates where moisture can compromise the seal.
Platform Bed Drawers Hide Everything Without Looking Cluttered
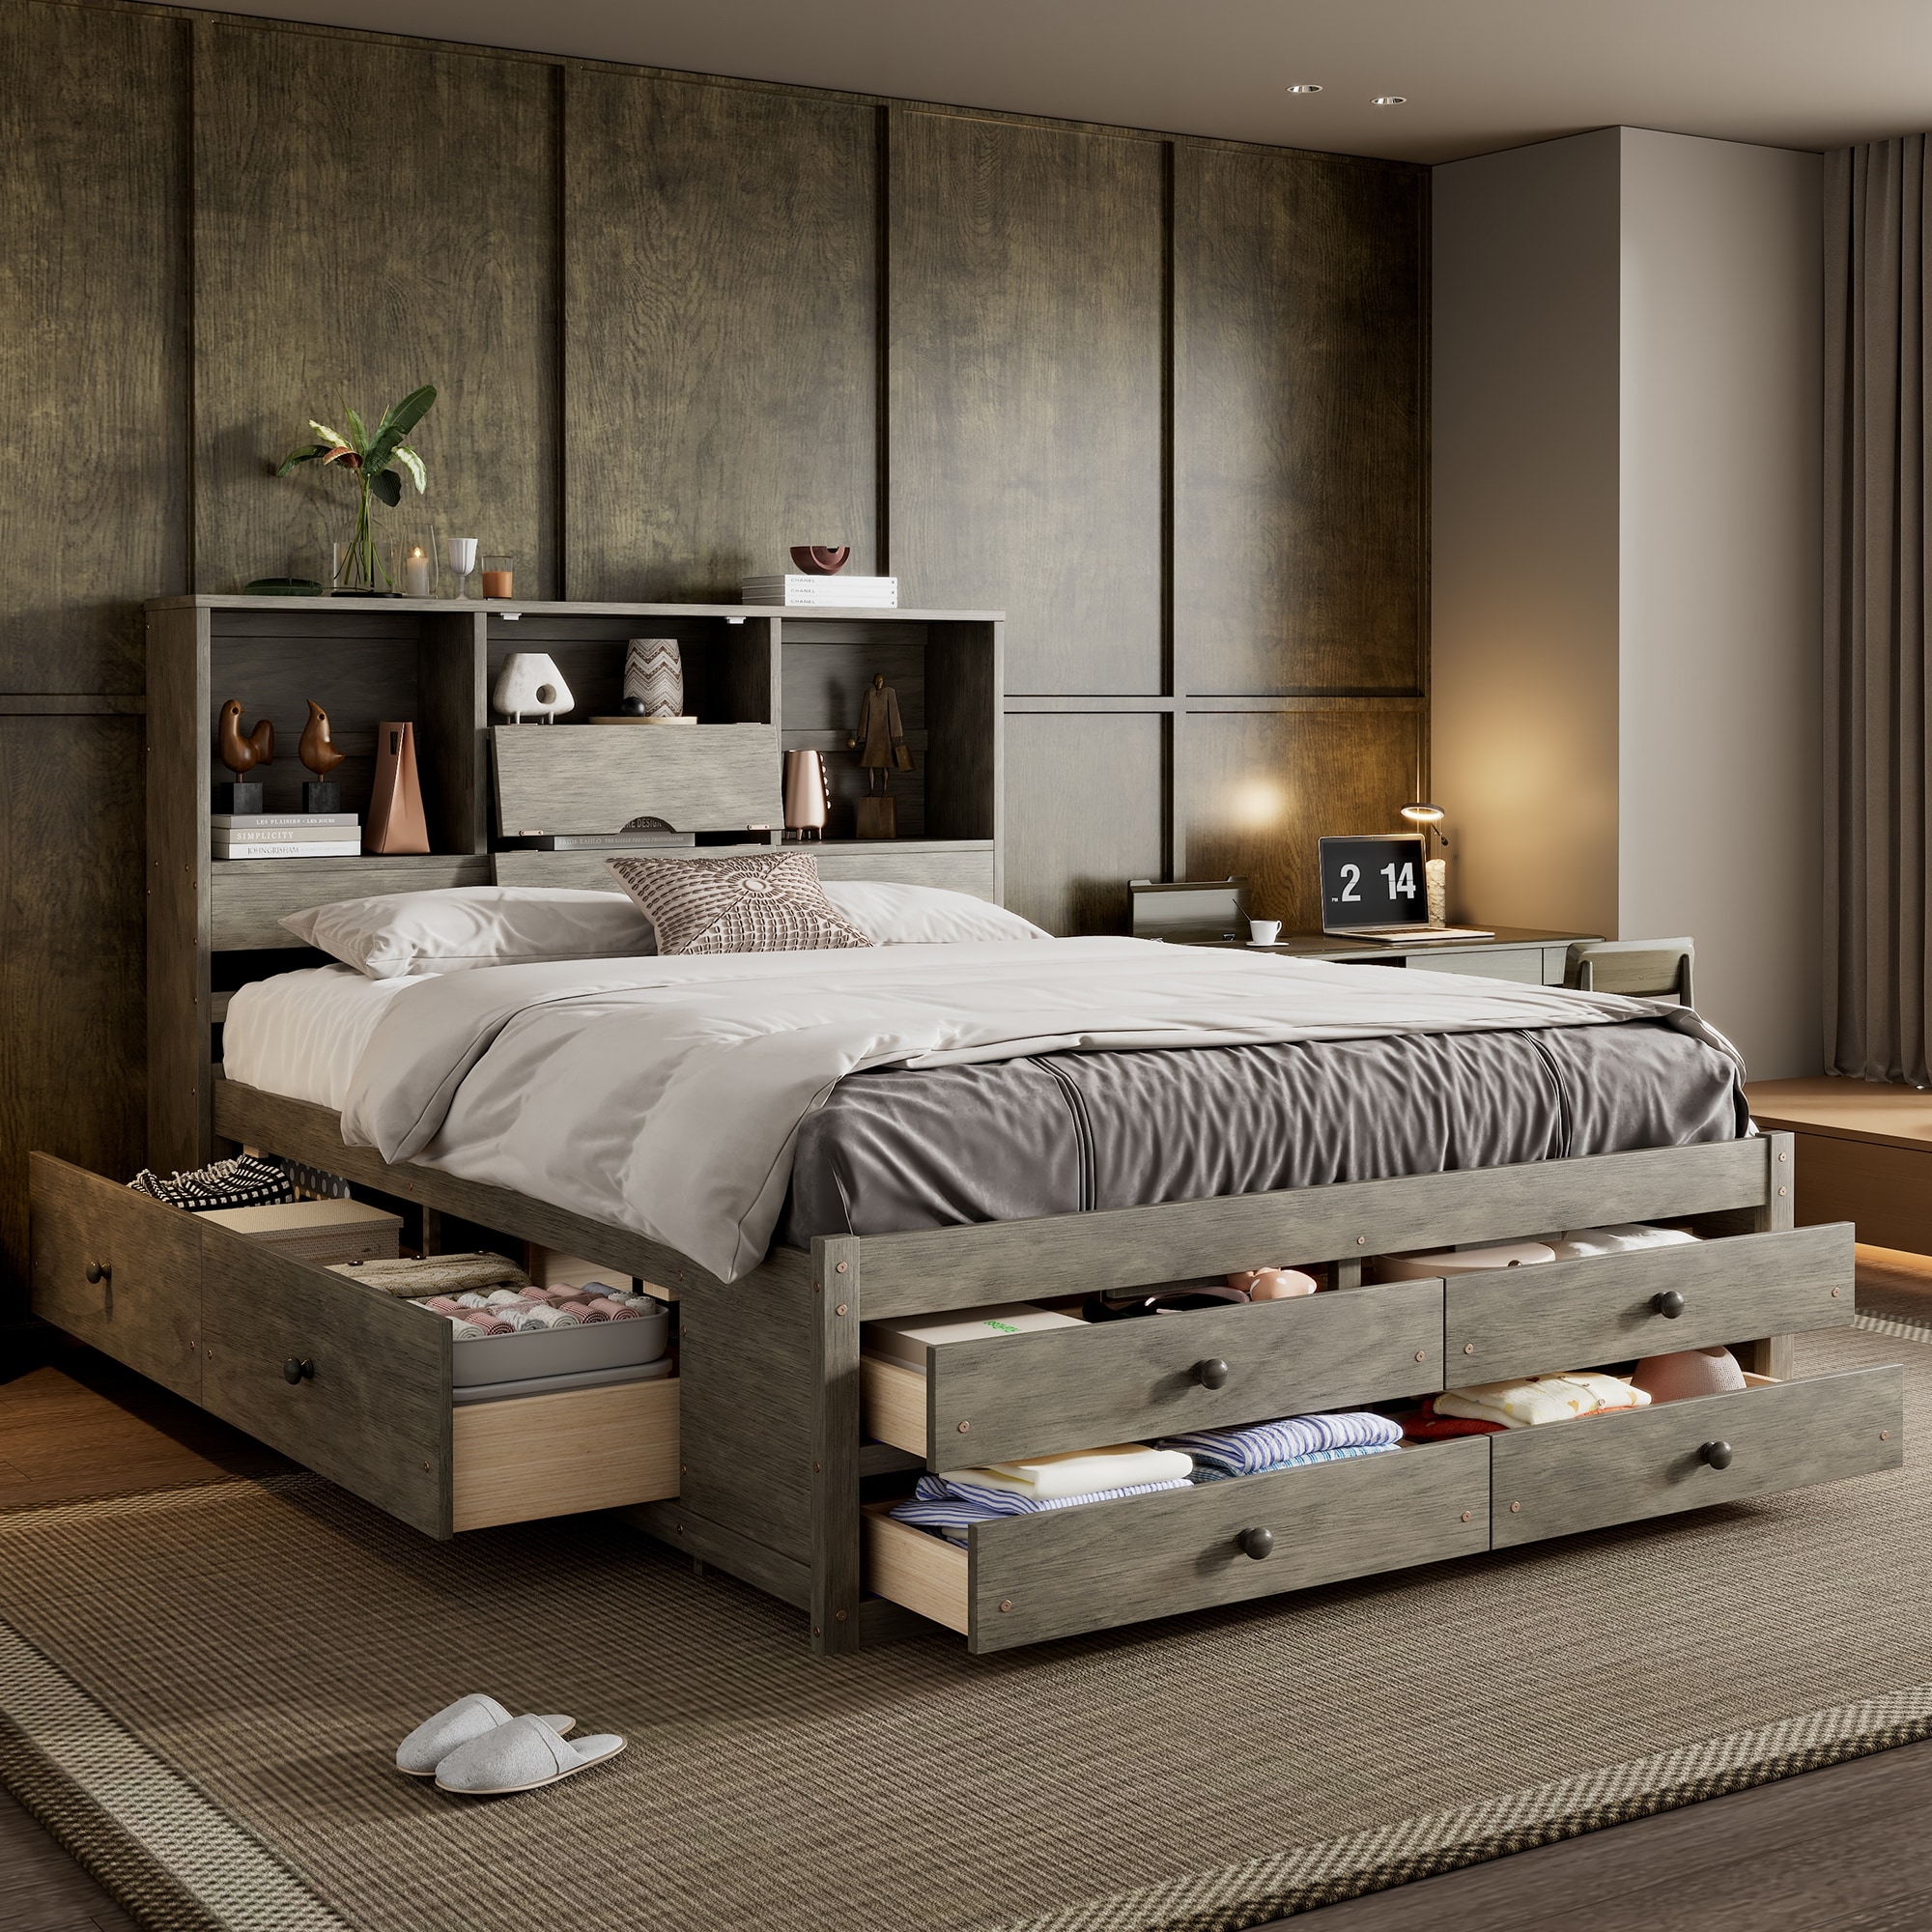
Built-in drawers measuring 36-48 inches wide provide 75-100 pounds of storage capacity each. Soft-close mechanisms prevent slammed fingers, while custom configurations allow 2-4 drawers per bed side. This creates 12-20 cubic feet of hidden storage—perfect for seasonal luggage or rarely used specialty bags. Unlike traditional under-bed containers that require bending and reaching, these drawers bring storage to you.
Pro tip: Dedicate one drawer specifically for overnight bags you grab last-minute. Store heavier items at the bottom and delicate bags on top to prevent crushing. Always leave 1-2 inches of space at the top to prevent jamming when full.
Wall Storage That Looks Good While Solving Your Problem
Floating Shelves Display and Store Without Floor Clutter
8-10 inch deep floating shelves handle small to medium bags while doubling as décor. Deeper 12-inch versions accommodate larger pieces. Install at 48-54 inches height for easy access—no bending or stretching. Weight capacity runs 15-30 pounds, so distribute heavier items across multiple shelves. This solution transforms blank walls into functional storage while showcasing your favorite pieces.
Visual cue: Look for shelves with discreet front lips to keep bags from sliding. Avoid installing shelves too high where bags become difficult to reach. Space shelves at least 12 inches apart to prevent bags from touching and transferring color.
Pegboard Systems Customize Completely for Your Specific Bag Collection
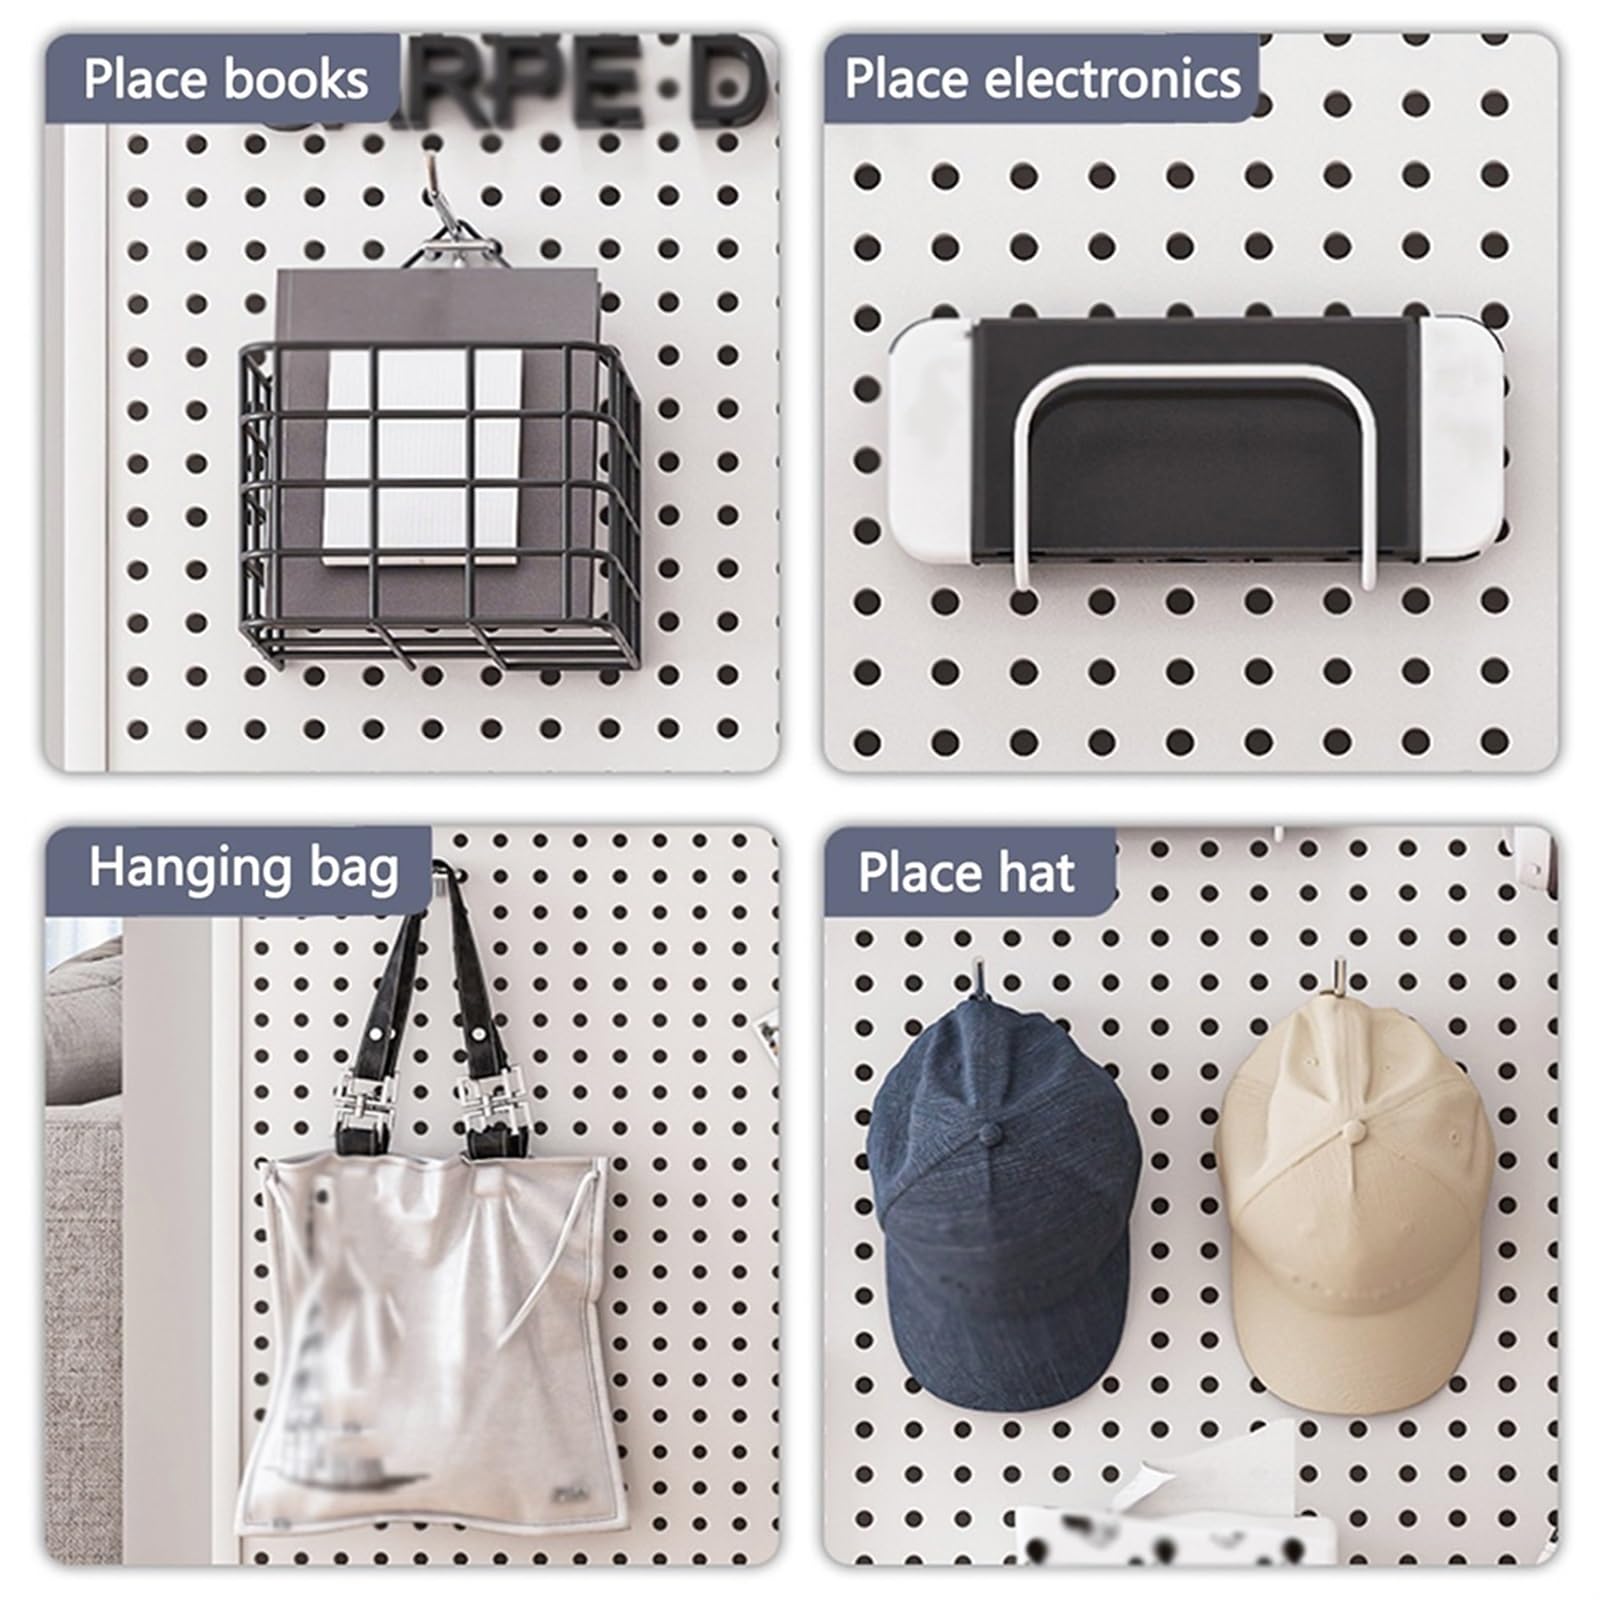
Standard 16″ x 16″ to 48″ x 96″ panels create unlimited configurations using J-hooks for handles and L-hooks for straps. Each hook supports 10-15 pounds, and paintable surfaces match any décor. Arrange hooks 6 inches apart for individual bags or create cascading displays for collections. This flexible system grows with your collection—you can add hooks as needed without replacing the entire setup.
Time estimate: A complete pegboard installation takes 1-2 hours, including painting to match your space. Start with 4-6 hooks and expand as needed. The beauty of this system is its adaptability—you can rearrange hooks in seconds as your storage needs change.
Protect and Organize Like a Pro With These Expert Techniques
Bag Shapers Prevent Collapsing During Long-Term Storage
Structured inserts maintain bag shape during storage. Small sizes (8″ x 4″ x 6″) protect clutches while large versions (14″ x 6″ x 10″) support structured totes. Inflatable options with air pumps adjust to any bag size, while cardboard versions offer budget-friendly protection. Never store bags empty—this is the #1 cause of permanent deformation that ruins expensive luggage.
Pro tip: Fill bags to 80% capacity using acid-free tissue paper or bubble wrap. Avoid newspaper at all costs—it transfers ink onto light-colored linings. Rotate stuffing materials monthly to maintain shape integrity without over-stuffing.
Cotton Dust Bags Shield Investment Pieces From Damage
Breathable cotton bags prevent dust accumulation while blocking color transfer between stored items. Use small (12″ x 16″) for evening bags, medium (16″ x 20″) for daily totes, and large (20″ x 24″) for weekenders. Drawstring closures keep everything secure yet accessible. This simple step protects your investment from environmental damage while keeping bags ready for spontaneous trips.
Common mistake: Never store leather bags in plastic—they need to breathe. The cotton material allows air circulation while blocking dust, preventing the musty odors that develop in sealed plastic containers.
Silica Gel Controls Humidity Before It Damages Your Bags
Include 2-3 silica gel packets per cubic foot of storage space. Color-change indicators show when replacement is needed—crucial for leather bags in humid climates. Each packet absorbs 40% of its weight in moisture, protecting against mold and mildew. This inexpensive solution prevents thousands in potential damage to your favorite pieces.
Quick fix: Place packets in corners of storage containers where air circulation is minimal. Check them monthly—when they turn pink, it’s time for fresh packets. For valuable collections, consider investing in a digital hygrometer to monitor humidity levels.
Budget-Friendly DIY Options That Actually Work
$20 Shelving System Transforms Any Wall Corner
Create 8 feet of bag storage using 1×8 pine boards and basic brackets. Stain or paint to match existing décor. Total cost: $20-50 depending on finish choices. Add curtain rods or tension rods within bookshelves for bonus hanging space. This solution works especially well in rentals where permanent installations aren’t allowed.
Step-by-step:
1. Measure your space and cut boards to size
2. Sand and finish wood
3. Install heavy-duty brackets into wall studs
4. Place boards on brackets
5. Add tension rods between shelves for hanging straps
Repurpose Bookshelves Into Bag Storage Without Permanent Changes
Transform existing bookshelves into bag storage by adding shelf dividers. Acrylic or metal dividers create individual slots preventing bag contact. Each divider adjusts 3-12 inches wide, accommodating various bag sizes without compression. This clever hack utilizes furniture you already own, saving both money and space.
Pro tip: Place heavier bags on lower shelves to prevent tipping. Use the top shelf for rarely used items and eye-level shelves for daily carry bags. Avoid stacking bags on the same shelf—this causes permanent creases.
Maintenance Keeps Bags Beautiful for Years
Pre-Storage Cleaning Protocol Prevents Permanent Damage
Empty every pocket and compartment completely. Vacuum interiors to remove crumbs and debris. Clean exteriors based on material—leather gets conditioning, fabric needs complete drying. Never store damp bags. This simple routine prevents stains from setting and odors from developing during storage.
Time estimate: A thorough cleaning takes 10-15 minutes per bag but saves hours of damage control later. Always condition leather before storage—it dries out faster when not in use.
Monthly Rotation System Prevents Permanent Creasing
Move stored bags to different positions monthly. This prevents permanent creasing and lets you inspect for issues. Adjust stuffing materials as bags settle, ensuring long-term shape retention. Treat your storage like a museum exhibit—regular rotation preserves condition while keeping everything accessible.
Pro tip: Set a calendar reminder for the first of each month. While rotating, check for moisture issues, pests, or other damage. Small problems caught early prevent expensive repairs later.
Your travel bags deserve better than a jumbled pile in the closet corner. Whether you choose over-door organizers for $30 or invest in custom closet systems, these travel bag storage ideas protect your investment while keeping every bag accessible. Start with one zone—maybe that under-bed space or the back of your bedroom door—and expand your system as needed. Your future self (and your beautifully organized bags) will thank you.