
Your passport stamps fade, hotel keycards get tossed, and digital photos gather dust in forgotten folders. But what if you could transform fleeting travel moments into tangible memories that transport you back to that Parisian café or Bali beach with a single page flip? The right travel scrapbook page ideas turn ordinary photos and ticket stubs into immersive storytelling experiences that improve with age.
Most travelers capture hundreds of photos but struggle to organize them meaningfully. Digital albums get lost in cloud storage, while traditional scrapbooks become overwhelming projects. The solution lies in targeted layout techniques that match your travel style—whether you’re documenting a weekend road trip or year-long backpacking adventure. These practical approaches fit any skill level while creating pages that spark instant nostalgia years later.
Transform Ticket Stubs Into Storytelling Borders
Arrange Chronological Transit Collections Along Page Edges
Skip the generic “memorabilia” heading and create visual narratives with your actual journey artifacts. Line up metro tickets, ferry passes, and attraction wristbands along the bottom of your page in the order you collected them. Overlap edges slightly so each item remains readable while forming a cohesive timeline. For European trips, group country-specific transit tickets together with small flag stickers marking border crossings. This technique works especially well for city-hopping adventures where transportation becomes part of the story.
Create Mini Collages For Specific Transportation Modes
Group similar items into thematic clusters rather than random collections. Mount train tickets in one corner with a simplified route map sketch, bus passes in another with local currency coins, and flight boarding passes with luggage tag accents. Use colored pens matching each transportation mode—blue for ferries, green for trains, red for buses—to create visual connections. For cruise vacations, arrange embarkation cards with port stop stickers marking each destination.
Build Destination-Specific Layouts With Authentic Elements
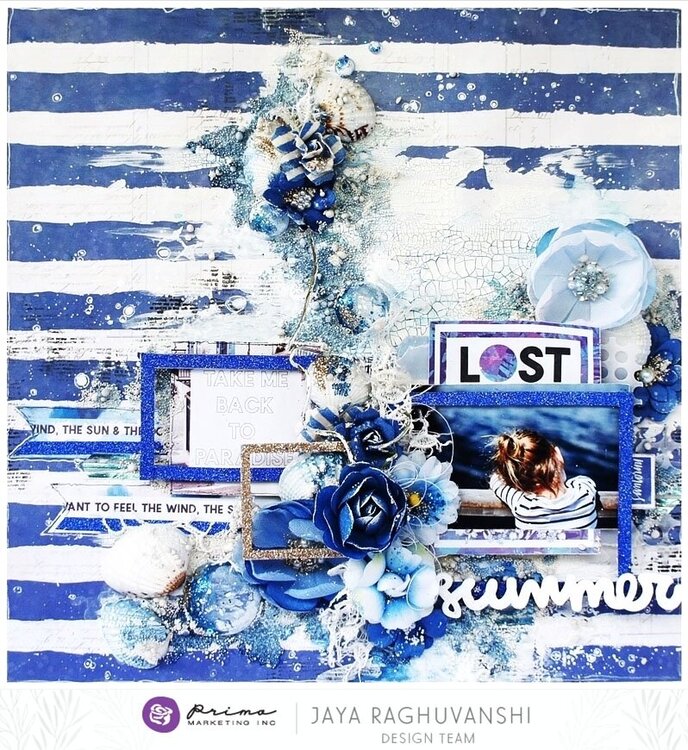
Capture Mediterranean Vibes With Blue Hues And Copper Accents
Your Santorini photos deserve more than generic blue paper. Layer varying shades from deep Aegean navy to bright white-blue in watercolor washes behind photos. Cut map sections into country shapes using the actual island contours. Add copper brads as sunbursts or gold foil dots for sunset warmth—elements that trigger sensory memories of Mediterranean light. Press dried bougainvillea petals between vellum pockets to preserve their vibrant pink against the blue backdrop.
Design Tropical Pages With Vibrant Food And Flora Details
Move beyond cliché palm tree stickers by incorporating authentic elements from your destination. Mount restaurant menus with washi tape borders matching the establishment’s colors. Add small food photos alongside handwritten notes about that unforgettable mango sticky rice. Use torn paper edges painted with turquoise and lime green watercolors to mimic ocean and jungle without overwhelming your actual photos. For Caribbean trips, weave thin strips of blue cellophane between photos to create moving water effects.
Master Photo Placement That Tells Your Unique Story
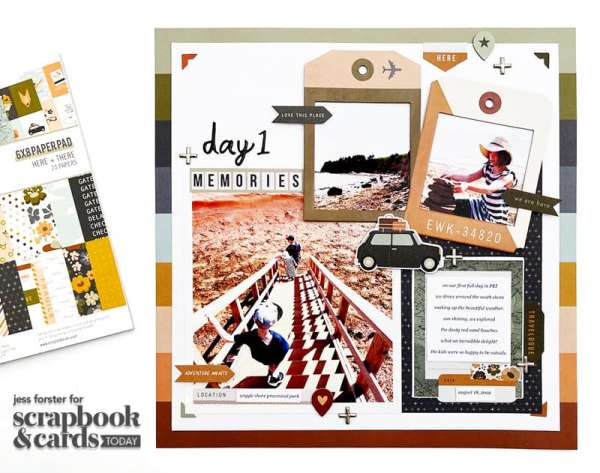
Sequence Photos To Recreate Daily Adventures Chronologically
Ditch the grid layout for purposeful storytelling. Place your morning coffee shop photo at the top left, afternoon exploration shots moving diagonally across the page, and evening skyline as the dramatic finale. Mix wide landscape shots with extreme close-ups of food textures, street signs, or architectural details that capture sensory experiences. For Tokyo trips, sequence photos from orderly morning commutes through chaotic Shibuya crossings to serene temple visits—letting the visual flow mirror your daily rhythm.
Create Depth With Layered Overlapping Techniques
Flat pages feel static, but strategic layering adds dimension that mimics real travel experiences. Position your main attraction photo first, then slightly overlap with smaller detail shots of textures or objects. Tuck pressed flowers, transit tickets, or fabric swatches partially beneath photos to create peek-a-boo moments. For mountain adventures, layer photos with torn paper edges mimicking peaks—darker tones in front, lighter distant ranges behind. This technique makes viewers feel immersed in the scene rather than observing from afar.
Budget-Friendly Techniques That Deliver Professional Results
Print Pharmacy Photos Using Strategic Coupon Timing
Skip expensive specialty printing with this pharmacy hack: Wait for weekly coupon app deals (usually Tuesdays) when 4×6 prints drop to 12-15 cents each. Print multiple small photos per sheet by selecting collage options—two 3×3 images or four 2×2 shots on one 4×6 sheet. Immediately after returning from trips, take advantage of “first-time user” deals from photo apps. Keep a dedicated travel printing folder on your phone with selected images ready for these deals.
Repurpose Everyday Items As Authentic Embellishments
Transform household objects into meaningful accents that outshine store-bought stickers. Cut brown grocery bags into strips for vintage-looking map backgrounds—age them with weak tea for instant character. Use leftover yarn from craft projects as route lines on maps or as page borders. Press local leaves between parchment paper with heavy books instead of buying expensive pressed flower kits. Hotel shampoo bottles become perfect containers for collecting beach sand—simply glue the tiny bottles to your pages with the sand visible inside.
Interactive Elements That Bring Memories To Life
Design Pull-Out Map Pockets With Hidden Journaling
Create small envelopes from actual map sections using double-sided tape along three edges. Slide in additional photos, handwritten notes, or pressed flowers that complement your main page. Label pockets clearly with destinations like “Hidden Gems in Lisbon” or “Unexpected Barcelona Finds.” For multi-city trips, make separate pockets for each location with color-coded tabs. These interactive elements encourage future you to engage actively with memories rather than passively viewing static pages.
Add QR Codes Linking To Digital Memory Vaults
Bridge physical and digital preservation by printing QR codes that link to video clips or audio recordings. A simple free QR generator connects codes to cloud folders containing street musician videos, ocean sounds, or restaurant ambiance. Print codes on small cardstock tags shaped like cameras or suitcases. For safety, link to private folders rather than public social media. Test each code thoroughly before adhering—it’s heartbreaking to discover broken links years later when trying to access precious audio memories.
Destination-Specific Design Hacks For Authentic Pages

Craft City Exploration Pages With Architectural Silhouettes
Skip generic skyline stickers by creating your own simplified building outlines. Trace distinctive structures from your photos onto tracing paper, then transfer to cardstock with a lightbox (or sunny window). Cut out silhouettes and arrange in layered rows showing city progression. Use metallic pens for window details on European cathedrals or geometric patterns for Middle Eastern architecture. For New York trips, create mini Empire State Building cutouts marking photo locations—each slightly smaller as you move toward the horizon.
Build Mountain Adventure Spreads With Textured Peaks
Mimic terrain with torn paper layers instead of flat backgrounds. Rip cardstock edges to create jagged mountain ranges, using darker browns and greens for foreground peaks, lighter tones for distant ranges. Add elevation markers with tiny numbered flags cut from map sections. Incorporate actual trail map snippets with your route highlighted in colored thread. For dramatic effect, punch small holes through pages representing tunnel passages, with the next page visible through them—perfect for Swiss Alps or Rocky Mountain adventures.
Long-Term Preservation Secrets Professionals Use
Store Bulky Souvenirs In Shadow Box Companions
Three-dimensional items like coins, shells, or small carvings destroy traditional scrapbook spines. Instead, create companion shadow boxes displayed alongside your album. Photograph each 3D item flat against graph paper for scale, then mount these photos in your scrapbook with notes like “See companion box #3 for actual artifact.” Use clear plastic containers with compartment dividers to organize small items, labeling each with trip dates and locations. This preserves both your book’s integrity and the physical connection to your journey.
Prevent Photo Damage With Acid-Free Material Strategies
Regular glue sticks and construction paper destroy photos within years through acid migration. Invest in pH-neutral adhesives like glue dots or photo squares specifically designed for preservation. Store completed pages in archival-safe page protectors, not plastic sleeves that can stick to embellishments. For coastal trips where humidity damages pages, include silica gel packets in your storage box. Test any new material on a spare photo first—watch for yellowing over two weeks before committing irreplaceable memories.
Your travel stories deserve better than forgotten digital albums. These targeted travel scrapbook page ideas transform ordinary mementos into immersive memory keepers that grow more precious with time. Start with just one technique matching your next trip—perhaps arranging transit tickets chronologically for that European rail adventure or building textured mountain layers for your Rockies hike. Each page becomes a passport stamp to your past, ready to transport you back whenever you need a mental vacation. The most meaningful souvenirs aren’t trinkets from gift shops, but the carefully crafted stories that preserve your journey’s soul.