
Nothing ruins the start of vacation faster than watching TSA toss your $80 face cream into the trash. You’ve spent weeks planning outfits, only to discover your favorite shampoo is 4.2 ounces—just over the limit. The good news? Once you master the 3-1-1 rule, packing liquids becomes as automatic as grabbing your boarding pass. This guide walks you through exactly how to pack liquids for air travel without confiscation, delays, or suitcase spills. You’ll learn which containers qualify, what gets exempted, and the smart packing strategies frequent flyers swear by—all based strictly on current TSA regulations.
Pass TSA Screening With Perfect 3-1-1 Execution
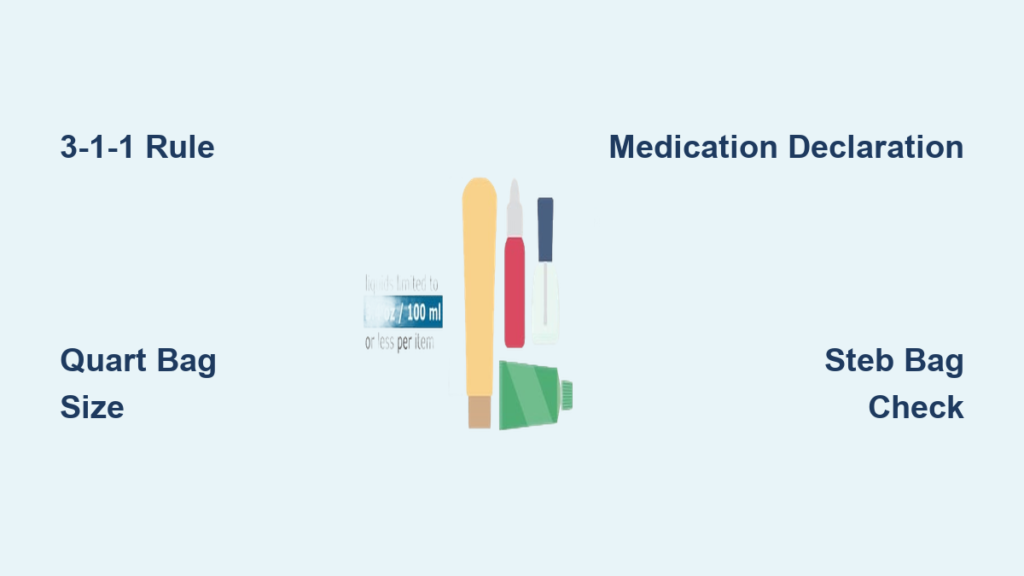
The 3-1-1 rule is your golden ticket through security: 3.4 ounces per container, 1 quart-sized bag total, 1 bag per passenger. Every liquid, gel, cream, paste, or aerosol in your carry-on must follow this formula—no exceptions for expensive products or “almost empty” bottles. Containers exceeding 3.4 ounces (100ml) trigger automatic confiscation unless they qualify for specific exemptions.
Verify Every Bottle Actually Meets 3.4 Ounce Limit
Don’t trust “travel size” labels—grab a ruler and check markings directly on the container. Many products labeled as travel-friendly actually exceed 3.4 ounces. Look for both metric (100ml) and imperial (3.4oz) indicators molded into the plastic. When transferring products to reusable bottles, use a kitchen scale to confirm exact weights before travel day. Pro tip: Fill containers only ¾ full to prevent pressure-expansion leaks during flight.
Organize Your Quart Bag Before Security
Lay all liquid items on your bed before packing. Count shampoo, conditioner, face wash, moisturizer, toothpaste, and lip gloss—each consumes precious quart-bag space. Those sample-sized perfume vials? They add up quickly. Limit yourself to 5-7 essential items to avoid overflow. Place larger items like sunscreen at the bag’s bottom and smaller items like lip balm on top for easy removal during screening.
Select a Quart Bag That Won’t Fail You
Skip flimsy sandwich bags—opt for freezer-strength gallon bags trimmed to quart size or invest in TSA-approved reusable bags with double zippers. The bag must close completely with room to spare; TSA rejects overstuffed bags that can’t be sealed. Critical mistake to avoid: Using bags labeled “TSA-approved” that actually exceed quart size—measure yours against a standard measuring cup to verify capacity.
Declare Medications Correctly to Avoid Delays

Prescription and over-the-counter medications bypass the 3-1-1 rule but require proactive declaration. TSA specifically states medications must be presented separately for screening, regardless of container size. This includes liquid antibiotics, insulin, cough syrup, and even liquid nutrition supplements.
Announce Medications Before X-Ray Screening
As you approach the security conveyor belt, immediately tell the officer: “I have liquid medications to declare.” Remove them from your bag and place in a separate bin before your quart bag. Keep pharmacy labels visible with your name matching your ID—unlabeled medications often trigger secondary screening. Time-saver: Pack medications in a clear, dedicated pouch clipped to your carry-on’s exterior for instant access.
Pack Exempt Items Outside Your Quart Bag
Place all medications in an easily accessible location—not inside your quart bag. This includes contact lens solution, liquid vitamins, and medical creams. TSA explicitly exempts these from the 3-1-1 rule but requires visual verification. For insulin pumps or medical devices, request a visual inspection instead of X-ray screening to prevent damage.
Carry Documentation for Special Cases
Bring a doctor’s note for unusual liquid medications or quantities exceeding typical use. While not mandatory, documentation speeds resolution if TSA questions items like liquid pain medication or medical cannabis oil (where legally permitted). Photograph prescriptions as digital backups in case physical labels get damaged.
Navigate International Duty-Free Liquids Successfully

Bought champagne at Heathrow? You can bring it through U.S. connections—but only with perfect compliance. Duty-free liquids over 3.4 ounces require specific packaging and documentation that many travelers overlook.
Confirm STEB Bag Integrity Before Departure
Your duty-free purchase must arrive in a Secure Tamper-Evident Bag (STEB) from the retailer. Immediately inspect the seal for intact security tape—no tears, punctures, or resealed edges. Broken seals mean automatic confiscation regardless of receipt. Expert note: Some airports now use electronic seals; verify yours shows “SECURE” status through the transparent bag.
Keep Receipts Visible and Current
That paper receipt must show purchase within 48 hours of your connecting flight. Place it inside the STEB bag (not your wallet) where TSA can see it immediately. Receipts missing store details, purchase time, or flight information get rejected. For multi-bag purchases, ensure each STEB has its corresponding receipt.
Expect Additional Screening Time
Even with perfect STEB compliance, TSA will pull duty-free bags for separate screening. Build 15-20 minutes extra into tight connections. Officers may swab contents or request you open the bag for inspection—never attempt to reseal a broken STEB mid-journey. Pro tip: Pack STEB bags in an exterior pocket for quick access during screening.
Prevent Checked Bag Liquid Disasters
Checked baggage lifts size restrictions but creates new risks. Altitude changes cause bottles to explode, ruining clothes and electronics. Follow these steps to contain potential leaks.
Triple-Layer Leak Protection System
Place each liquid bottle in its own quart-sized zip-top bag, then insert all bags into a rigid leak-proof toiletry case. Finally, wrap the entire kit in a plastic grocery bag for ultimate containment. This creates three barriers against leaks—critical for toiletries like hair dye or nail polish remover.
Apply the Plastic Wrap Seal Hack
Unscrew bottle caps, stretch plastic wrap tightly across the opening, then re-screw caps firmly. This creates an airtight secondary seal against pressure changes. Works flawlessly for shampoo, lotion, and sunscreen containers. Warning: Skip this with aerosols—the wrap could interfere with spray mechanisms.
Position Liquids Strategically in Suitcase
Pack toiletry kits in the center of your suitcase, surrounded by soft clothing like sweaters or jeans. This cushions bottles against impacts and insulates against temperature extremes in cargo holds. Never place liquids near electronics or delicate fabrics—leaks spread rapidly during turbulence.
Speed Through Security With Pro Organization
Frequent flyers clear security 60 seconds faster by optimizing liquid packing. Your organization determines whether you hold up the line or breeze through.
Create a Permanent TSA-Ready Setup
Store your quart bag in an exterior zip pocket of your carry-on. When reaching security, you’ll grab it without opening your main compartment. Pack medications in a neck wallet or fanny pack for instant access. Time test: Practice removing both in under 10 seconds—this prevents frantic digging when officers are waiting.
Pre-Test Your Packing System
The night before travel, simulate security screening: Time how quickly you can remove your quart bag and medications. Check if bottles rattle or shift during “bag handling.” Fix issues like tangled zippers or overfilled containers before airport stress hits. Update your packing checklist based on this trial run.
Use Smart Refillable Containers
Buy reusable 3-ounce silicone bottles with measurement markers and wide mouths for easy filling. Label each with product name and travel date. Decant only what you’ll use—most travelers overpack toiletries by 30%. Pro tip: Pack solid alternatives (shampoo bars, solid perfume) to free up quart-bag space.
Fix Common Liquid Packing Mistakes Immediately

Even seasoned travelers face liquid emergencies. Knowing how to recover saves your trip and expensive products.
Handle Oversized Items Discovered at Security
If TSA finds a 4-ounce bottle, you have two options: Sprint to the airline counter to check your bag (if gates are nearby) or surrender the item. Never attempt to drain excess liquid into the trash—TSA prohibits this due to spill risks. For valuable items like prescription lotions, ask if a medical exemption applies retroactively.
Repair a Torn Quart Bag Mid-Trip
Airport shops sell quart bags, but they’re flimsy and overpriced. Always pack a backup in checked luggage. In emergencies, visit airport pharmacies—they often provide sturdy replacement bags for free. For immediate fixes, use clear packing tape over tears (avoiding the zipper area).
Resolve Mixed-Up Exempt Items
Accidentally packed medications in your quart bag? Calmly remove them during screening and declare: “I have medications to separate.” TSA won’t penalize honest mistakes if you correct them proactively. Keep a printed copy of TSA’s medication policy on your phone for reference.
Build Your Permanent TSA-Compliant Travel Kit
Create a dedicated toiletry kit that stays packed year-round. This eliminates last-minute errors and ensures you never forget critical items.
Essential 3-Ounce Container Checklist
Stock silicone bottles with: shampoo, conditioner, face wash, moisturizer, sunscreen, and body wash. Add travel-size toothpaste, deodorant, and daily medications. Rotate seasonal items (like bug spray) using a labeled inventory sheet inside your toiletry case.
Medication Storage System Protocol
Use a clear, waterproof pouch with compartments for prescriptions, OTC meds, and medical devices. Include a printed medication list with dosages, frequencies, and prescribing doctors. Keep this pouch clipped to your carry-on strap—not buried in pockets.
Emergency Backup Supplies
Pack these lightweight problem-solvers: Two extra quart bags, 5 sandwich bags, a small plastic wrap roll, and absorbent powder (like baby powder) to neutralize leaks. These weigh under 4 ounces but solve major crises when bottles burst mid-flight.
Final TSA Liquids Checklist Before Departure
Count every liquid container—3.4 ounces maximum. Fit all into one quart bag that zips shut completely. Pack larger liquids in checked baggage with triple-layer leak protection. Declare medications and baby items before security screening. Keep duty-free purchases in original STEB bags with visible receipts. With these systems perfected, you’ll glide through checkpoints while others surrender full-size bottles at the trash can—turning liquid packing from a stress point into your seamless travel superpower.